
Introduction
In this part of our series, we will explore how to secure a .NET Core Web API using Azure AD authentication. By the end of this guide, you will have a secure API that can authenticate requests using tokens generated by Azure AD.
Prerequisites
- Basic knowledge of .NET Core and C#
- An Azure account
- Visual Studio or Visual Studio Code
- Link to my blog where I show securing Front end applicaiton
- Github Source Code
Step 1: Register the Front End application in Azure AD
1.1 Register the React(for eg) Font End Application. I named it "ReactApp-WebApiIntegration-FEAppRegistration"
I won't go to detail of this application registration. Look at my blog on how to register application on Azure AD
1.2 Register the .Net Core Web API
Register your WebAPI application too.Eg named "Dotnet-Core-WebApiRegistration". You will get "Application Id(clientId)" and "Tenant Id".

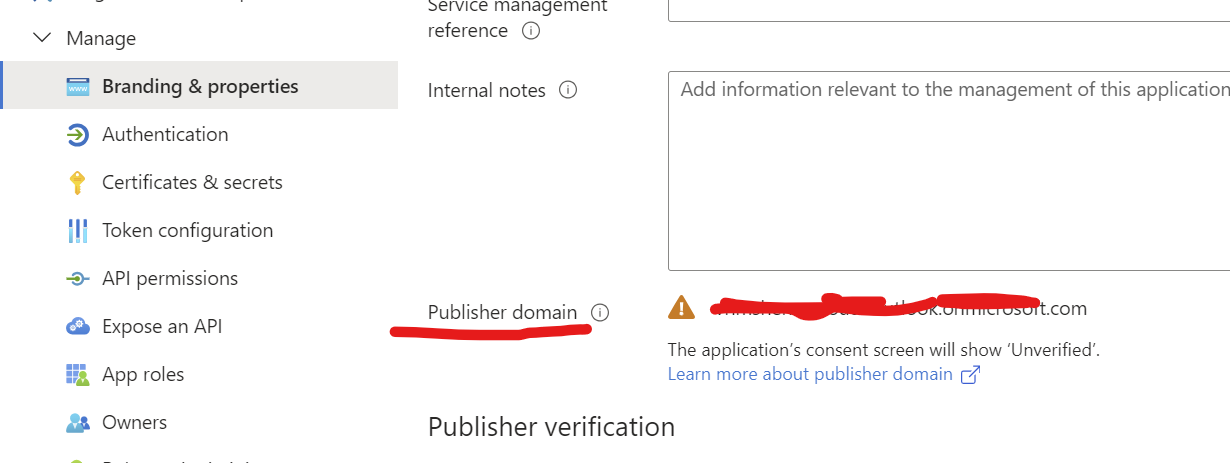
1.2a Get the publisher domain
Navigate to your registered WebAPI application on Azure AD.In the
registered API application, go to Manage --> Branding and properties
--> Publisher Domain. Keep it handy as well along with the items
required in step 1.2
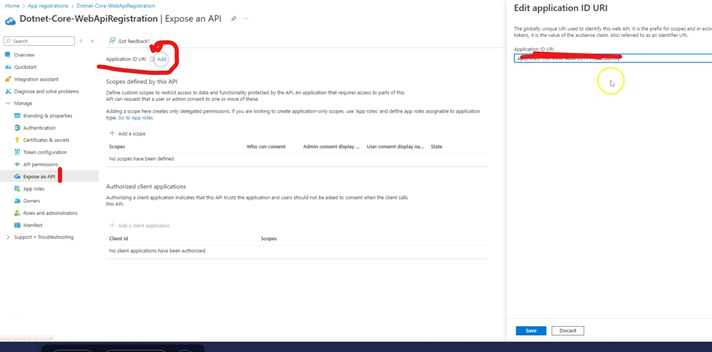
1.3 Expose an API
Go to "Expose an API". Click on "Add" next to "Application ID URI".
It will open up a window on right with URI already entered. Save.
Now you will have an "Application ID URI" in the format
api://{ClientId}.
ClientId
is what we had in step 1.2. Sample image below
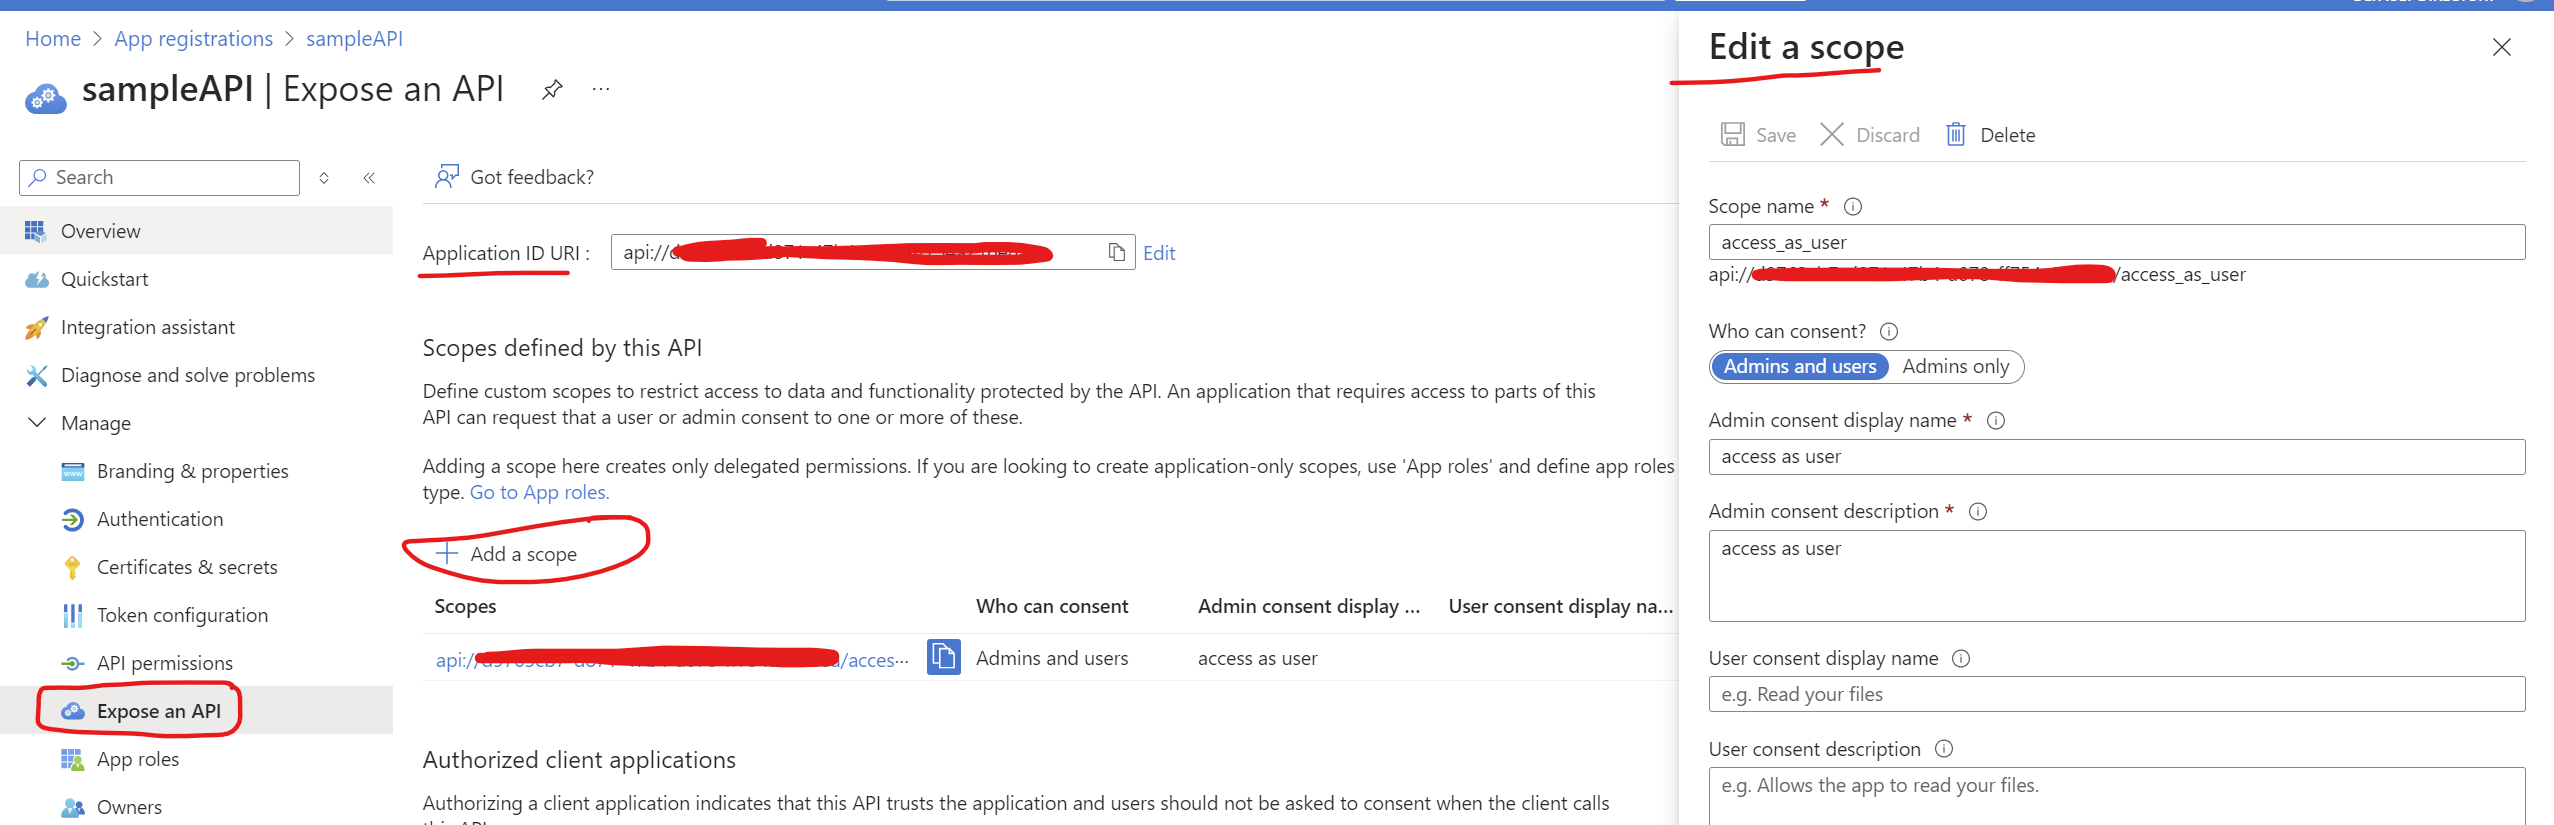
1.3a Add Scope
On the same "Expose an API" tab. Click on "Add a scope", set the
Scope name (e.g., access_as_user),
provide a Display name and
Description, set "Who can consent?" to "Admins and
users", and click "Add scope" and Save. Sample image below
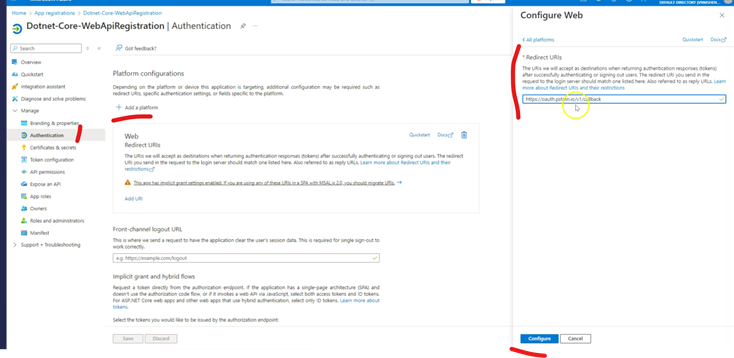
1.4 Add redirect URI for Postman (to authenticate via browser)
Go to Authentication --> Add a Platform --> Choose "Web" (to
build,host and deploy a web server application. I chose this for my
Postman)-->
https://oauth.pstmn.io/v1/callback (postman callback url) -->Configure
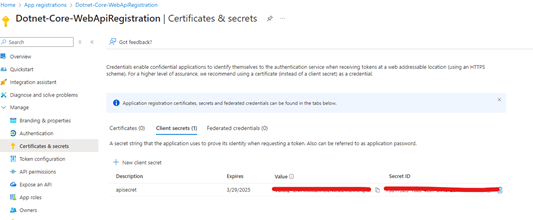
1.5 Add Client Secret
For "Confidential Clients" eg a web application or a server-side application , a client secret is mandatory. On the other hand for Public Clients eg a mobile app or a single-page application a client secret is NOT mandatory
Go to "Certificates & secrets" --> "New Client Secret" --> Add a
secret and note down the value of the secret
1.6 Keep below values handy
We have configured our API application. Keep below values handy we will need it down below when we test our API through Postman
- ClientId - From step 1.2 above
- TenantId - From step 1.2 above
- Publisher Domain - From step 1.2a above
- Application ID URI - From step 1.3 above
- Scope name- From step 1.3a above
- Client secret name- From step 1.5 above
Step 2: Configure the .NET Core Web API
2.1 Install Required NuGet Packages
Open your .NET Core Web API project and install the necessary NuGet packages:
dotnet add package Microsoft.AspNetCore.Authentication.JwtBearer
dotnet add package Microsoft.Identity.Web
2.2 Configure appsettings.json
Add your Azure AD configuration to appsettings.json.
Fill in these details from step 1.2 above
{
  "AzureAd": {
    "Instance": "https://login.microsoftonline.com/",
    "Domain": "yourdomain.com",  // Replace with your Azure AD domain
    "TenantId": "your-tenant-id",
    "ClientId": "your-api-client-id"  // This is the ClientId of the registered API
  }
          }
2.3 Update Program.cs
Configure the authentication middleware in
Program.cs:
using Microsoft.AspNetCore.Authentication.JwtBearer;
using Microsoft.Identity.Web;

var builder = WebApplication.CreateBuilder(args);

// Add services to the container.
builder.Services.AddAuthentication(JwtBearerDefaults.AuthenticationScheme)
    .AddMicrosoftIdentityWebApi(builder.Configuration.GetSection("AzureAd"));

builder.Services.AddControllers();
builder.Services.AddEndpointsApiExplorer();
builder.Services.AddSwaggerGen();

var app = builder.Build();

// Configure the HTTP request pipeline.
if (app.Environment.IsDevelopment())
{
    app.UseSwagger();
    app.UseSwaggerUI();
}

app.UseHttpsRedirection();
app.UseAuthentication();
app.UseAuthorization();
app.MapControllers();
app.Run();
2.4 Secure Your API Endpoints
Add the [Authorize] attribute to your controllers or
actions to secure them:
using Microsoft.AspNetCore.Authorization;
using Microsoft.AspNetCore.Mvc;

[ApiController]
[Route("[controller]")]
[Authorize]
public class WeatherForecastController : ControllerBase
{
    // ... existing code ...
}
Step 3: Test Your API via Postman
3.1 Launch your .Net Core Application
My application is started locally on port "https://localhost:7297/"
3.2 Open Postman
Open Postman and click on new Request.In "Authorization" tab, choose
"Auth Type" as "OAuth 2.0". And then have below values in
Configure New Token section. I am reading these values from
my "local" Environment.
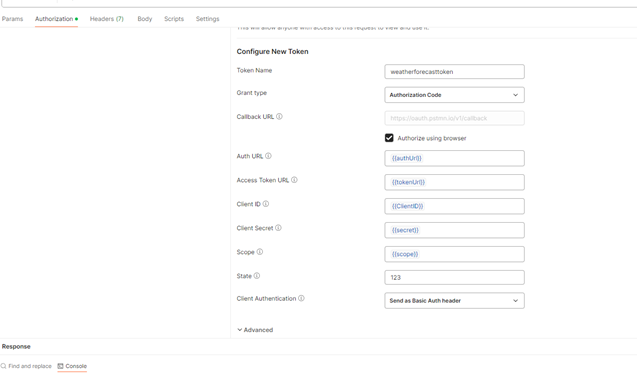
3.2a URL's used above
- authUrl- https://login.microsoftonline.com/{tenant-id}/oauth2/v2.0/authorize
- tokenUrl- https://login.microsoftonline.com/{tenant-id}/oauth2/v2.0/token
- Other values like "ClientId","scope","secret" are also configured in Environment but these values are from Step 1.6
3.3 Generate New Token
On the Postman's request, on Authorization tab, scroll down and select "Get New Access Token". This will popup a window on browser to authenticate. Once authentication is successfull, choose "Use Token" from response and make the Get WeatherForecast call by clicking on "Send"
Step 4: Test Your API via React Front End
4.1 Pass Access Token to API from FrontEnd
To test api from FE,put the access token to all fetch/axios calls. Basically add header of "Authorization" and value as"Bearer" + token where token is the auth token we received after login.
function App() {
            const isAuthenticated = useIsAuthenticated();
            const { instance, accounts } = useMsal();
            const [authToken, setAuthToken] = useState();

            useEffect(() => {
              if (authToken) {
                fetch("https://localhost:7297/Weatherforecast", {
                  headers: {
                    Authorization: "Bearer " + authToken, //send the token
                  },
                })
                  .then((response) => response.json())
                  .then((data) => {
                    // Handle the response data here
                    console.log(data);
                  })
                  .catch((error) => {
                    // Handle any errors here
                    debugger;
                    console.error(error);
                  });
              }
            }, [authToken]);

            useEffect(() => {
              if (accounts.length > 0) {
                instance
                  .acquireTokenSilent({
                    ...loginRequest,
                    account: accounts[0],
                  })
                  .then((response) => {
                    setAuthToken(response.accessToken);
                  });
              }
            }, [accounts, instance]);

            return (
              <div>
                {isAuthenticated ? (
                  <h1>Welcome to our application. You are logged in</h1>
                ) : (
                  <Login >
                )}
                </div>
            );
          }
          export default App;
4.2 Add Relevant Scope
Note To access api from React Front End application, ensure that you add below to "scopes"- "api://" + API_CLIENT_ID + "/access_as_user" where API_CLIENT_ID is the ClientId of the Web Api application that you registered with Azure Ad. Sample authConfig.js code below
              import { CLIENT_ID, TENANT_ID, API_CLIENT_ID } from "./constants";
              export const msalConfig = {
                auth: {
                  clientId: CLIENT_ID,
                  authority: "https://login.microsoftonline.com/" + TENANT_ID,
                  redirectUri: "http://localhost:3000",
                },
              };
              export const loginRequest = {
                scopes: ["openid", "profile", "api://" + API_CLIENT_ID + "/access_as_user"],
              };
Link to official Microsoft Website where they talk about Enabling Authenticaion in React SPA App
Link to my blog where I show securing Front end applicaiton
Conclusion
By following these steps, you have successfully secured your .NET Core Web API using Azure AD authentication. This ensures that only authenticated users can access your API endpoints, providing an additional layer of security.