Integrate React application with Azure AD Login
20 Sep 2024
Step-by-Step Guide to Secure Your React App with Azure Active Directory and MSAL.js
- Registering your app in Azure AD
- Configuring authentication settings
- Implementing the login functionality using the `@azure/msal-react` library and
- By the end of this blog, you'll have a fully functional React app with Azure AD authentication
- Github source code
Step 1: Create React app and install dependencies
                - npx create-react-app my-react-azureAD-app
                 //Navigate to the project folder
                 - cd my-react-azureAD-app
                 - npm install @azure/msal-react @azure/msal-browser
Step 2: While the packages are getting installed, lets hop on to Azure AD and do whats required
- Login to Azure portal(if you dont have one signup) and look for "App Registrations" service in the search bar. Click on "New Registration"
-
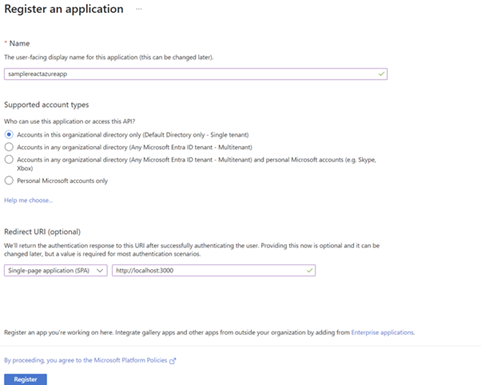
Let's "Register the application". You can enter any
name(I opted for samplereactazureapp) below and that can be
edited later. Select the Redirect URL. I selected SPA and the
default react app URL i.e http://localhost:3000
-
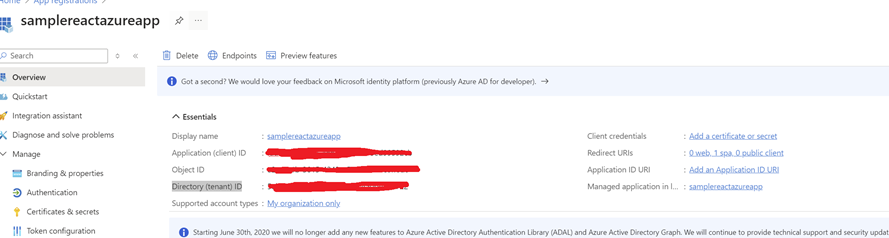
Once the app is registered, navigate to overview and copy
"Application(client) ID","Directory (tenant) ID" and keep them
aside. You will need them soon.
-
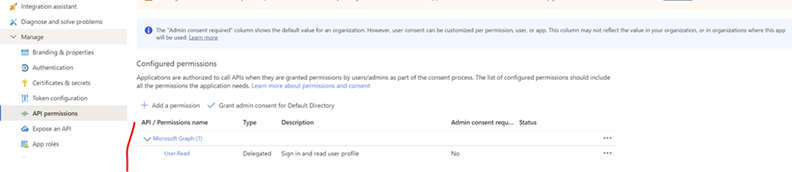
Go To API Permissions --> Add a permission --> Choose Microsoft
Graph --> Choose Delegated permissions and add permission you
are after (eg User.Read) --> Add permissions.
PS: It was already added for me
- If you want you can create client secret. I didn't for this demo

Step 3: Back to the react app
Now that we are done with Azure AD registraion of our applicaiton, lets go back to our react-app "my-react-azureAD-app".
-
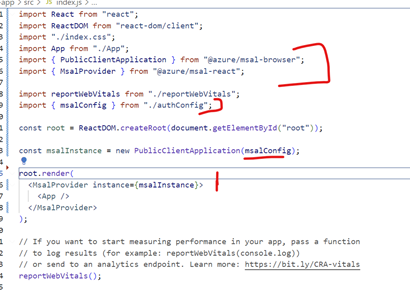
Update index.js and wrap it with MsalProvider.Also add
below changes (marked in red)
- Add imports PublicClientApplication, MsalProvider and msalConfig. "msalConfig" is a const exported from authConfig.js file that has clientId,tenantId etc
-
Now lets create authConfig.js and add below details that
we copied and kept aside when we registered the app on Azure
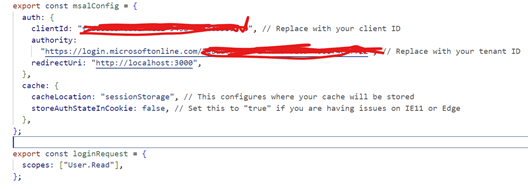
scopes can also take below values
- openid - Ability to authenticate the user and obtain an ID token
- profile - Requests access to user's basic profile info (eg name, email,profile picture)
- email - Requests access to user's email
- user.read - This also request's access to user's profile through the Microsoft Graph API. "user.read" is a specific scope for the Microsoft Graph API.
-
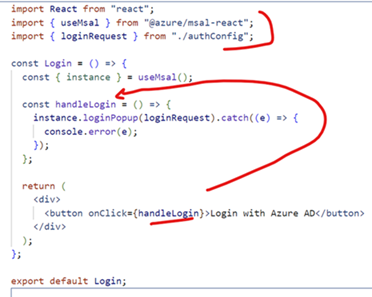
Create a Login component and import useMsal and
loginRequest(from our authConfig.js file). This page exposes a
button that allows uses to login with AzureAD and when you click
this button it popups Azure AD login page
-
Update App.js and add import useIsAuthenticated and the
Login component.Check if user is authenticated and if user is
not authenticated then navigate to Login component.
import logo from "./logo.svg";
import "./App.css";
import { useIsAuthenticated } from "@azure/msal-react";
import { Login } from "./Login";
  function App() {
    const isAuthenticated = useIsAuthenticated();
     return (
      <div>
        {isAuthenticated ? (
          <h1>Welcome to our application. You are logged in </h1>
        ) : (
          <Login />
        )}
        </div>
      )}
Step 4: Lets see the flow now
- "npm start" - My react app starts on port 3000
-
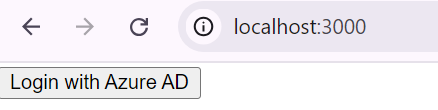
Launches "http://localhost:3000/" and redirects to Login
component.Click on the "Login with Azure AD Button"
-
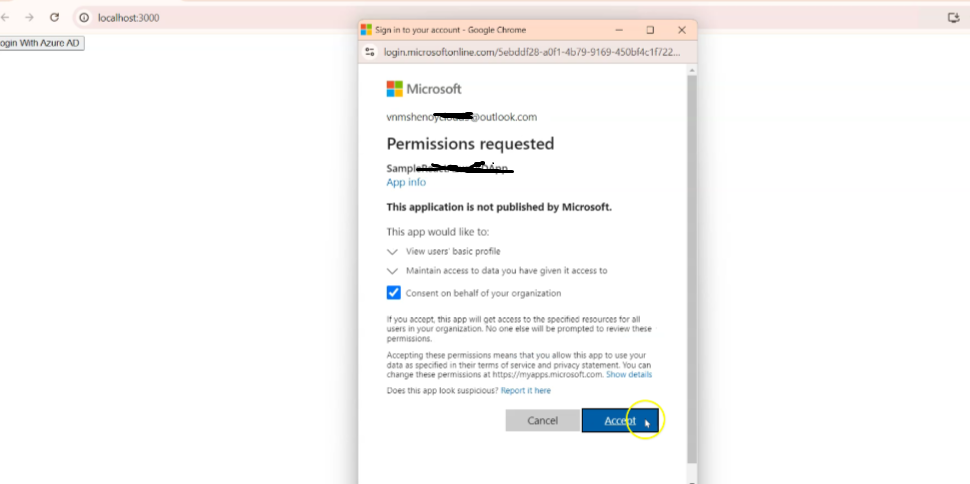
It pops up signin page. Login with your Azure account.After
succesfull Sign in it redirects to the landing page.
-
In the "Developer Tools> Network tab" , you should see a request
to "token" endpoint . The response you should see all tokens.
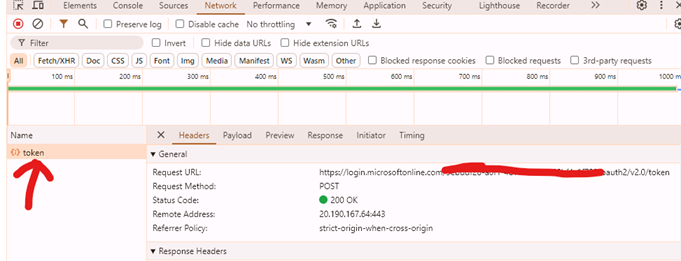
- This token needs to be used for authenticating the user to an Backend API fetch calls. If you want to see how you can secure your Web API check out my blog Securing a .NET Core Web API with Azure AD Authentication: Integrating with a React App
Conclusion:
Thats how you interagrate Azure AD with react app.I hope you found this artilce helpful in setting up Azure AD authentication for your React app. If you have any questions or feedback, feel free to leave a comment below. Happy coding, and stay secure!
Link to official Microsoft Website- Enabling Authenticaion in React SPA App
Link to my blog where i show securing a .NET Core Web API with Azure AD Authentication App
Email me at "techspacedeck@gmail.com" incase you have queries. Alternatively, you can fill the "CONTACT" form or drop a comment below